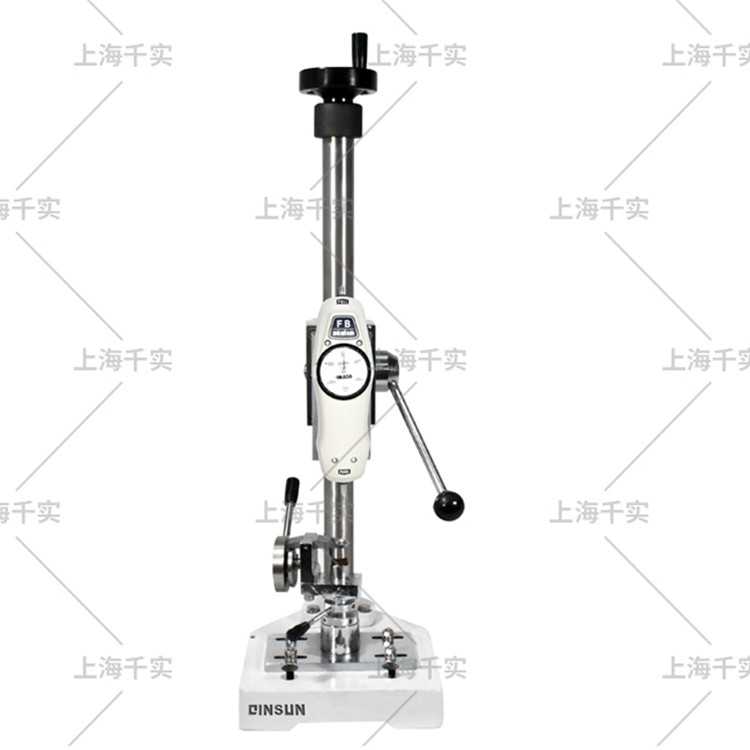
Button strength tester operation process

The button strength tester can do a uniform and vertical tensile test on various buttons on the clothing to detect whether the firmness can meet the relevant safety standards.

Testing purposes:
The purpose of this test is to define the responsibility of the garment manufacturer to ensure that the buttons, buttons and fasteners can be properly fixed on the garment, and the degree of button fastening; to prevent the button from detaching from the garment, causing the baby to have a chance to swallow it . Therefore, all buttons, buttons and fasteners on garments must pass the button strength tester.
Meaning and function:
1. The test method of this instrument is used to measure the strength of the vertical pull test on buttons and clothes, and buttons and buttons do not pull off the clothes.
2. The button sewing specifications required by this method should be in accordance with the standard set by the button manufacturer.
3. This test method is used to establish the relevance of different wearing environments, and to compare the types and brands of different buttons.
4. This standard may include hazardous materials, operations and equipment, but the standard does not list all possible safety issues in use. Therefore, it is the responsibility of users of this standard to establish relevant safety and health rules, and to determine appropriate regulations before use.
5. All buttons need to be sewn tightly on the fabric with chain stitches.
6. According to the test requirements, when the size of the large button is greater than 6mm or less than/equal to 6mm, the button must be able to withstand 90N and 50N respectively.
Instrument characteristics:
The button gripper is made of stainless steel; it has a wide range of applications and can be used for different button tension tests.
Operation process:
1. Put the cloth with the button holder into the base fixture (under the concave pressing block), keep the button facing upwards, push the push rod handle to clamp the cloth piece firmly (and make sure the fabric has been pressed live).
2. Rotate the upper clamp counterclockwise to open the grip.
3. If you use the push-pull force timing of the HP series (digital display push-pull force gauge), turn on the power and wait until the LCD display shows zero.
4. Install the push-pull force timer of the NK series (pointer push-pull force gauge), press the switch button once to return the finger to the zero position.
5. Rotate the hand wheel of the body to move the upper clamp downwards and be able to grasp the button.
2021-04-07 17:25

